Complete Guide to AmpVortex Series Amplifier Control4 Driver
📋 Table of Contents
The AmpVortex series amplifiers (including AmpVortex-16060, 16060G, 16100, 16100G, 16200, 16200G, etc.) are high-performance professional audio devices that integrate seamlessly with Control4 smart home system. This guide details the entire process of installing, configuring, and troubleshooting Control4 driver, ensuring stable communication and smooth operation between Control4 system and AmpVortex amplifier, while meeting the audio control needs of residential and commercial scenarios.
This comprehensive guide covers everything from driver installation to advanced troubleshooting, enabling you to achieve seamless integration between Control4 system and AmpVortex professional audio amplifiers.
Figure: Control4 Composer Pro interface for driver import
1. Preface: Core Explanation of Driver
The Control4 driver discussed in this guide is a dedicated .c4z driver designed specifically for AmpVortex series amplifiers. Its core function is to establish reliable communication between Control4 system and AmpVortex amplifier, enabling remote control of the amplifier—such as power on/off, volume adjustment, zone control, and source switching—through Control4 system, without the need for additional third-party plugins. This driver is engineered to unlock the full potential of AmpVortex amplifiers, including their multi-zone flexibility and broad streaming compatibility.
💡 Key Features of the Control4 Driver:
- Dedicated .c4z Format: Exclusively designed for AmpVortex series amplifiers, ensuring optimal performance and compatibility.
- Complete Feature Set: Enables comprehensive control including power management, volume control, zone switching, and source selection.
- No Third-Party Plugins Required: Standalone driver solution that doesn’t rely on additional plugins or middleware.
- Multi-Zone Support: Fully supports AmpVortex’s native 8-zone audio control capabilities.
- Streaming Protocol Integration: Optimized for enhanced streaming features on G-series models.
🎯 Comprehensive Model Compatibility
The driver is fully compatible with all AmpVortex models: AmpVortex-16060, 16060G, 16100, 16100G, 16200, 16200G, and other compatible models in the series. It supports all versions of Control4 (4.0 and above) and is optimized to work with the unique power and connectivity features of AmpVortex devices.
Figure: AmpVortex-16060G professional amplifier product view
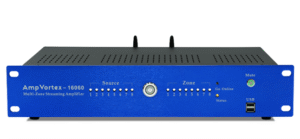
AmpVortex-16060
2. Prerequisites
Before beginning the installation process, ensure you have the following requirements and equipment ready:
🖥️ Control4 Composer Software
Latest version recommended to avoid compatibility issues and ensure support for AmpVortex-specific features. Ensure your Control4 Composer is up-to-date with the latest updates and patches.
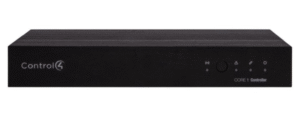
🏠 Control4 Director (Host Device)
Host device in normal operation, connected to the same local area network (LAN) as the AmpVortex amplifier. This is crucial for establishing stable communication between Control4 system and amplifier.
🔊 AmpVortex Series Amplifier
Any model: AmpVortex-16060, 16060G, 16100, 16100G, 16200, 16200G, etc., powered on and connected to LAN. Visit AmpVortex product page for detailed specifications.
📁 Driver File (.c4z Format)
Driver file in .c4z format, matching the specific AmpVortex model. Ensure the driver is tailored to your model to unlock all features, especially for G-series models with enhanced streaming capabilities.
🌐 AmpVortex IP Address
IP address of the AmpVortex amplifier (obtained from the amplifier’s app UI, web interface, or router management interface). This is essential for establishing network communication with the Control4 system. Each AmpVortex device has a unique IP address, especially important in multi-amplifier setups.
3. Step-by-Step Driver Import Process
The driver import process is consistent across all AmpVortex models. Follow these steps to import the driver into Control4 Composer:
1.Open Control4 Composer
Launch Control4 Composer and create a new project or open an existing one. Ensure you have administrator privileges if working in a restricted network environment.
2.Add Driver
Click the top menu bar: Driver → Add Driver. This will open the driver import dialog where you can select the .c4z file from your computer.
3.Select Driver File
In the pop-up window, select the downloaded .c4z driver file corresponding to your AmpVortex model (e.g., AmpVortex-16060G driver for 16060G model). Ensure the driver matches the amplifier model to avoid feature limitations.
4.Confirm Import
Click Confirm Import. The system will automatically verify compatibility. If the prompt shows “Driver Compatible”, the import is successful. If compatibility issues arise, update Control4 Composer to the latest version.
5.Restart and Verify
Restart Control4 Composer. The driver will be synchronized to the local driver library, and you can find it in the “Device List” by searching for “AmpVortex” or the specific model name (e.g., “AmpVortex-16200”). The driver is now ready for configuration.
AmpVortex Control4
4. Step-by-Step Configuration Guide
4.1 Add Amplifier to Project
- Open System Design interface in Control4 Composer. This is where you design and organize your smart home system layout.
- In the right-side panel, check “Local Drivers” and search for the imported AmpVortex driver (e.g., “AmpVortex-16100G” or “AmpVortex-16200”).
- Double-click the driver, select the corresponding room (e.g., Living Room, Conference Room, Home Theater), and add it to the project. This ensures the amplifier is integrated into the desired control zone of your smart home system.
Figure: Control4 system design with AmpVortex amplifier
4.2 Configure Network and Communication Parameters
- Select the added AmpVortex amplifier device in the project tree and enter the Properties panel.
- Fill in the IP address of the AmpVortex amplifier (ensure it is in the same LAN as Control4 host to avoid communication failures). Each AmpVortex model has a unique IP address if multiple amplifiers are used.
- Port configuration (model-specific, optimized for AmpVortex performance):
- AmpVortex-16060, 16100, 16200: Default port (no modification required), compatible with standard Control4 communication protocols.
- AmpVortex-16060G, 16100G, 16200G (G-series models): Default port, switch to port 8080 if communication fails (optimized for G-series’ enhanced streaming and Google Cast compatibility).
- Save the configuration and confirm that the amplifier is connected to the same LAN as the Control4 host (no IP conflict). This step is critical for ensuring seamless command transmission between Control4 system and amplifier.
4.3 Configure Core Control Features (Model-Specific & Universal)
All AmpVortex models support comprehensive control features through the Control4 driver, with additional optimizations for G-series models. Configure the following settings to fully integrate the amplifier into your Control4 system:
4.3.1 Universal Control Features (All Models)
🎵 Zone Control
Each zone supports independent mute, volume adjustment, and source selection. Configure zone-specific controls in the Control4 interface to enable independent audio management across different rooms, a key feature of AmpVortex amplifiers for whole-home audio systems.
📡 Source Control
Each audio source (including Airplay 2, Spotify Connect, DLNA, Bluetooth Audio, Google Cast, Qobuz Connect, HDMI ARC, LINE In, SPDIF IN, etc.) supports independent mute, volume adjustment, and input type selection. Select the appropriate input type in Control4 Properties panel to match AmpVortex amplifier’s input ports.
⚡ Power Control
Configure power on/off commands to integrate with Control4 scenes (e.g., “Home Mode” automatically turns on the amplifier, “Away Mode” turns it off to save energy). This enables intelligent power management based on your daily routines.
📊 Status Feedback
Enable real-time status feedback (power state, volume level, source type, fault alerts) to sync with the Control4 panel and mobile app, allowing for easy monitoring and troubleshooting. This two-way communication ensures you always know the amplifier’s current state.
4.3.2 Model-Specific Configuration (AmpVortex Series)
🔊 AmpVortex-16060, 16100, 16200 (Standard Models)
Focus on basic configuration (power, volume, source switching) and verify multi-zone functionality, ideal for standard whole-home audio setups. These models provide reliable performance for residential applications with up to 8 independent audio zones.
🎵 AmpVortex-16060G, 16100G, 16200G (G-Series Models)
Ensure Google Cast and enhanced streaming protocols are enabled in the driver settings. These models support broader wireless connectivity, so confirm the driver is configured to recognize these features for seamless casting from mobile devices. Visit AmpVortex G-series page for detailed streaming capabilities.
⚡ High-Power Models (16100, 16100G, 16200, 16200G)
Configure volume limits to protect speakers and ensure stable performance, leveraging their higher continuous power output (up to 110W per channel for select models). These models are ideal for larger spaces and commercial applications requiring higher power output.
4.4 Test Communication
Right-click the AmpVortex device and select Test Communication to verify the connection:
✅ Connected
If “Connected” is displayed, the configuration is successful, and the amplifier can be controlled normally through the Control4 system. You can now proceed to create scenes and automation schedules.
❌ Disconnected
If “Disconnected” is displayed, check the IP address, network connection, or port settings (especially for G-series models using port 8080) and try again. Refer to the troubleshooting section for detailed solutions.
4.5 Sync Configuration to Control4 Host
After completing all configurations, click Update Project in the top menu bar of Control4 Composer to sync the settings to the Control4 Director host. Once synced, the AmpVortex amplifier will respond to all Control4 commands, and all configured features will be active.
Figure: Syncing Control4 project configuration
5. Key Notes for Usage
Follow these important notes to ensure optimal performance and avoid common issues during day-to-day operation:
| Note | Details & Recommendations |
|---|---|
| Exclusive Compatibility | The driver is exclusively compatible with AmpVortex series amplifiers (AmpVortex-16060, 16060G, 16100, 16100G, 16200, 16200G, etc.) and cannot be used for amplifiers of other brands, as this will cause communication failures and feature malfunctions. |
| IP Address Changes | If the AmpVortex amplifier’s IP address changes (e.g., after a router reset), re-enter the driver configuration interface to update the IP address and resync the project—no need to re-import the driver. Use static IP assignments for critical installations. |
| Driver Updates | When updating the driver, replace the old .c4z file with the latest version corresponding to your AmpVortex model. This ensures compatibility with new Control4 updates and unlocks any new features added to the amplifier. Check AmpVortex driver support page for the latest updates. |
| Multi-Zone Setup | For multi-zone setups, ensure each zone is correctly assigned in the Control4 system to avoid cross-zone interference, leveraging AmpVortex’s native multi-zone flexibility. Test each zone independently before activating complex automation scenarios. |
| Network Stability | Maintain stable network connectivity between Control4 Director and AmpVortex amplifiers. Consider using dedicated network switches for larger installations to minimize latency and ensure reliable communication. |
Figure: Control4 app controlling AmpVortex amplifier
6. Troubleshooting
Here are common issues and their troubleshooting methods when working with AmpVortex amplifiers and Control4:
| Fault Phenomenon | Troubleshooting Method |
|---|---|
| Failed to import driver | Re-download the complete .c4z driver file corresponding to your AmpVortex model from AmpVortex official website; update Control4 Composer to the latest version to resolve compatibility issues. Ensure file integrity and administrator privileges. |
| No communication with amplifier | Check if the IP address is correct and the amplifier is on the same LAN as the Control4 host; for G-series models, verify port 8080 is used if the default port fails; restart the amplifier and Control4 Director if needed. Ensure no firewall rules are blocking communication. |
| No sound from amplifier | Check the amplifier’s power supply and volume settings; verify the correct input source is selected in the Control4 interface; ensure speaker connections are secure and compatible with the amplifier’s power output. Test with a direct connection to rule out amplifier issues. |
| Streaming features (e.g., Google Cast) not working (G-series models) | Ensure the G-series driver is correctly imported; verify the amplifier is connected to the internet and streaming protocols are enabled in the driver settings; restart the amplifier’s network connection. Check router settings for required ports and UPnP configuration. |
| Driver mismatch | Use the driver specifically designed for your AmpVortex model (e.g., 16060G driver for 16060G model); re-import the correct driver and resync the project. Verify model compatibility before installation. |
| Zone control issues | Verify zone assignments in Control4 project; check physical connections to zone outputs; ensure zone mute status is not accidentally enabled. Reset zone configurations and test individually if issues persist. |
Figure: Control4 troubleshooting diagnostics
7. Summary
The key to integrating AmpVortex series amplifiers (AmpVortex-16060, 16060G, 16100, 16100G, 16200, 16200G, etc.) with the Control4 system is to use the correct model-specific driver, ensure stable network connectivity, and configure the amplifier’s features to align with your smart home needs. AmpVortex amplifiers are designed for flexibility, offering robust multi-zone control and broad streaming compatibility, and the Control4 driver unlocks these capabilities for seamless integration.
✅ Integration Benefits:
- Seamless Control: Full integration with Control4 ecosystem for unified smart home management.
- Multi-Zone Audio: Independent control of up to 8 audio zones from a single interface.
- Streaming Ready: Enhanced wireless streaming capabilities on G-series models.
- Professional Quality: High-performance audio amplification for residential and commercial applications.
- Easy Maintenance: Centralized configuration and monitoring through Control4 Composer.
By following this guide, you can quickly complete the driver import, configuration, and debugging processes, realizing seamless linkage between Control4 system and AmpVortex amplifier. This integration ensures stable, reliable operation of your entire smart audio system, delivering high-quality audio experiences across all zones.
Figure: AmpVortex series amplifier product lineup
🔗 Related Resources & Support
Official Links
- AmpVortex Official Website – Complete product portfolio and technical specifications
- AmpVortex-16060 – High-performance multi-zone amplifier
- AmpVortex-16060G – Enhanced version with GC streaming technology
- AmpVortex-16100 – Mid-range commercial audio solution
- AmpVortex-16100G – GC-enhanced model with advanced streaming
- AmpVortex-16200 – Powerful amplifier for large installations
- AmpVortex-16200G – Flagship model with maximum power
- AmpVortex Technical Support – Documentation, manuals, drivers, and troubleshooting guides
- AmpVortex Driver Downloads – Latest Control4 drivers for all AmpVortex models
- Control4 Official Website – Control4 smart home automation system information
- Control4 Composer Software – Download and documentation for Control4 Composer
Related Articles
- AmpVortex Blog – Latest articles on audio technology and smart home integration
- Smart Home Integration Guides – More tutorials on Control4 and other smart home systems
- Audio Optimization Tips – Best practices for configuring professional audio systems
- Control4 Education Resources – Official Control4 training and certification programs
AmpVortex website:https://www.ampvortex.com
This is the integration guide Control4 dealers have been waiting for. Having a dedicated driver for AmpVortex amplifiers means seamless multi‑zone audio control without workarounds. I appreciate how you covered discovery, binding, and feedback within the C4 ecosystem. One question: does the driver support per‑zone EQ and delay settings directly from the Control4 interface? Thanks for putting this together!